chicago-spotlight-PAGE-01-2017.jpg

Blog

Pets and Home Sales: Tips and Tricks
house for sale pets

When it comes to selling your house, it’s important to get everything as close to perfect as possible before showing off the house. Not only will this let potential home buyers see the property at its best, but it will also help to justify a higher cost than a messy house might. There are a few things that can make this a bit harder to achieve, though. One of the big hurdles that you might need to plan around is if you have pets that live in the home.

This doesn’t mean that pets are a bad thing, of course. There’s a decent possibility that at least some of the people interested in your home will have pets as well – and having a property that’s already pet friendly could actually be a big selling point for them. The issue is that the house is your pet’s home, too, so you have to make sure that they stay safe during showings while also ensuring that they don’t negatively affect the sale.

Thorough Cleaning Time

Before any showing, make sure that your pets are cleaned up after as much as possible. This means freshly cleaned litter boxes with new litter, freshly cleaned carpets to take care of any pet stains or shed fur, odor-neutralizing air fresheners… as much as possible, you want the lingering sights and smells that pet ownership can bring to disappear. This not only puts your best foot forward, but it will also impress potential buyers who may not be pet people.

Time Your Showings Carefully

One big rule to follow when you have pets is that there shouldn’t be any showings when you or your spouse or partner aren’t at home. Even if you have a terrific Realtor or real estate agent helping you to sell your house, your pets are still your responsibility. More importantly, should your pet get out, they are more likely to respond to you calling them than a stranger. This rule is very important for your pet’s safety, so it’s definitely not one to break.

Avoid Direct Interaction

Another important part of showing your home while you have pets is to keep your pets from being in the same area as potential buyers. While you might have a dog who’s just a bundle of cuddles and only wants to love everyone, a potential buyer might be afraid of dogs or could just like cats more and not want to be bothered. This also helps to protect your animals, as it ensures that they won’t accidentally get hurt if they startle a potential buyer or get accused of trying to attack them.

Disclose Your Pet Ownership

Something to keep in mind once you’re ready to start showing your home is that you need to disclose the fact that there are animals living on the property (and in the house, if they’re inside pets.) This not only lets potential buyers know that there may be animals on the premises, but it also serves as a warning for those with severe pet allergies. Even though you should clean thoroughly (remember that first tip?), a potential buyer who has a very severe allergy will know that there might be a risk in your home. It might lose you that particular sale, but that’s still better than making someone sick.

Philip Schwartz
The Post-Inspection Negotiation Two-Step: What You Can Expect
home inspection

Inspections are an important part of the home-selling process. The home inspector will locate any potential problems with the property, making sure that all involved know what’s wrong and what needs to be fixed. What happens then, though? Whose responsibility is it to fix the issues that the home inspector discovered?

As with a lot of problems, the answer is a resounding “It depends.”

Gauging Severity

One big determining factor in how problems found in a home inspection are dealt with is how severe the issues are. A major problem with a property can be a deal breaker for many buyers. Depending on where you live, such a problem may even have to be addressed before the property can be sold. State-level restrictions vary, but most are rooted in making sure that sellers can’t avoid fixing potentially dangerous problems or leave them for the buyer to discover on their own. Even if a problem isn’t critical, most states require that any problems found by a home inspection be disclosed to potential buyers. This disclosure is a big deal, as it can significantly affect how much the buyers are willing to pay.

Loan Program Requirements

Beyond repair and disclosure requirements that vary from state to state, different loan programs (such as those offered by the Federal Housing Authority or Department of Housing and Urban Development) may have additional requirements when it comes to problems discovered during a home inspection. Many programs have very specific guidelines regarding the condition of the property that a buyer can purchase using those loans. If a loan program won’t allow a purchase while unsatisfactory conditions exist, the issues must either be repaired or have satisfactory arrangements made to facilitate the repair before the purchase can continue. Keep in mind that not all loan programs will make allowances for future repairs, either; in those cases, the repairs will either have to be made in full or the buyer will have to find a different lender that does not follow the same strict requirements.

Negotiating Repairs

In the event that there aren’t specific regulations at the state level or restrictions in the buyer’s loan program concerning problems with the property, it falls to the buyer and the seller to determine what repairs will be made. This is typically part of the price negotiation, as buyers are willing to pay more for a property that they don’t have to make extensive repairs to. In many cases, sellers may offer to cover the most pressing repairs and address any serious issues while the buyer assumes responsibility for any other issues found in the buyer’s home inspection disclosure. In many cases this will be agreed to in writing, either at the request of one of the parties or as a condition of the mortgage loan that the buyer is using for the purchase. By formalizing the agreement in writing, it ensures that both parties understand their responsibility and protects the seller from potential legal action regarding issues that weren’t addressed (provided that the seller completed all of the repairs that they agreed to.)

Market Strength

The strength of the housing market can have a big effect on who does the bulk of repairs on a property. If similar properties are plentiful and interest rates are low, it creates what’s referred to as a “buyer’s market”; buyers have a lot of options and can easily walk away from the purchase if they don’t get what they want. In this situation, the buyer has a lot of leverage and can usually get the seller to agree to either a lower price or a higher percentage of the repairs. When the opposite occurs and there are few choices and higher interest rates, a “seller’s market” is created. Buyers can’t walk away as easily and be guaranteed a good deal elsewhere, so sellers can often hold their ground more and get buyers to agree to higher prices or a greater percentage of repairs.

Philip Schwartz
Is Your House Ready for an Electric Car?
car charging.jpg

While they aren’t quite dominating the automotive market just yet, electric vehicles are definitely seeing a rise in popularity. More and more consumers are embracing the vehicles as a stylish and more environmentally friendly way to get around, and charging stations are starting to appear in places such as hotels, rest stops and even shopping centers. There’s definitely a market for electric cars out there, and it’s growing.

If you’ve considered an electric vehicle before, you should stop and ask yourself if you’re actually ready for one. This isn’t a trick question or a suggestion that electric cars are somehow superior; it’s a legitimate question that you’ve probably never given a thought to. Electric vehicles need to be plugged in and charged somewhere, so you need to figure out whether your house is actually ready for an electric car.

Electrical Access

A lot of garages have electrical outlets in them, but not all of them do. Even for those that do, they aren’t always conveniently located for plugging in an electric vehicle. Either way, this can be a big problem when it comes time to recharge your car. Without convenient outlets you will have to get creative while charging, and an electric vehicle isn’t exactly something you want to risk running a questionable extension cord to. When trying to determine if your home’s ready for an electric car, this is one of the big points that you need to consider. If you don’t have an outlet where you need one and aren’t willing to try some more creative parking options to get to the closest plugs, you may need to wire and install an entirely new outlet.

Can You Handle the Draw?

Electric cars pull a decent amount of electrical current while they charge. This isn’t a major problem in many modern homes but depending on what else is on a circuit with the vehicle, you may end up tripping a breaker or blowing a fuse. In some cases, the added draw of the electric vehicle may actually push you into using more electricity overall than your main panel was designed to handle. If you live in an older house, you could wind up facing a lot of hassle with your electricity if you get an electric car. Depending on how bad the problem is, you may even need to get some wiring reworked or have a new service panel installed to handle the increased electrical requirements.

Charging Station Issues

While the points made thus far have dealt with basic charging options that plug into a standard electrical outlet, home charging stations are also an option. These stations recharge electrical vehicles much faster than chargers that plug into an outlet, though they also have to be installed before you can use them. Depending on where you live, there may be laws or ordinances restricting who can install an electrical vehicle charging station and where they can be installed. Permits and inspections may also be required, all of which will cost money in addition to the cost of the charging station itself and professional installation.

An Alternative Consideration

To reduce or eliminate the cost of recharging an electric car, some owners choose to install solar panels that provide power to a dedicated charging station. This can be a great option, as it eliminates long-term costs while also providing a greener method for keeping your car charged. Unfortunately, there may be restrictions or other ordinances surrounding the installation of solar panels, as well. Solar panels also often have a high up-front cost, though depending on the size of the panel you choose you may be able to keep this down.

Philip Schwartz
Tips for Surviving a Remodel
remodel.jpg

Remodeling your home is a major project. Most people don’t realize just HOW major of a project it is until they’re deep into it, however. If you aren’t careful, a remodel can cover everything with dust, throw off your day-to-day plans and leave you feeling more frazzled than you’ve ever been. More than one homeowner has found themselves wondering, well before the job was complete, why they ever decided to undertake such a monumental task. Whether you’re already hip deep in a remodel or you’re just considering one, here are a few ways to keep you from experiencing this same sense of mid-remodel regret.

Start Small

While it’s tempting to launch into a full remodel and get everything done at once, taking the time to prioritize certain aspects of the remodel can make it much less disruptive and easier to control the budget. Consider which issues are the most pressing as well as which would be the most difficult to pull off. Avoid projects that are excessively difficult such as moving plumbing unless there’s a good reason to take them on. Prioritize everything else so you can complete each project in turn and move in on the big picture over time.

Respect the Construction Zone

Remodeling creates a LOT of dust, debris and noxious odors. Many contractors will put up plastic sheets and take other precautions to try and keep all of this out of parts of the house where they aren’t working, but there’s only so much that can be done in this regard. Try to plan your time at home so that you aren’t there during the worst of the noise and fumes. Pick up an air filtration system or two that you can put near the work areas to grab as much dust as possible. Pack up belongings that you don’t want exposed like you would if you were moving, putting them in boxes and sealing them with tape. This lets the remodel proceed as quickly as possible without giving you such a huge mess to clean up afterward.

Stick to the Budget

One big issue when remodeling is that the budget tends to spiral out of control. Once you get going, you may find that there are extra bits of spending that are needed to finish the job. There’s also the temptation to upgrade some of your plans since the newer version wouldn’t cost that much more. Unfortunately, changing your plans or upgrading your purchases can really add up over time. Make a budget for what you want, add about 20% to 25% to account for the unexpected, then stick with it. If there’s anything that you REALLY want to upgrade but aren’t sure that the budget can handle it, save it until as close to the end as possible before authorizing the cost.

Talk It Out

Communication with your contractors is a key component to making it through a remodel unscathed. This doesn’t mean that you should require them to report every little thing back to you, of course; unless there’s a problem that they need your insight or authorization for, you’ll be best served to let the pros do their job. That doesn’t mean you shouldn’t check in and see how things are progressing, especially if you need to structure part of your day around the work that’s being done. Talking with your contractors regularly helps you to plan your life better around the remodel and saves them the trouble of tracking you down when they need to check with you about something.

Philip Schwartz
Care and Feeding of Brick Siding
caring for brick

Having brick siding installed on your house gives it a classic look. Unfortunately, a lot of people view brick as an install-it-and-forget-it option and allow that look to deteriorate over time. Brick homes require basic maintenance and care just like vinyl and wood siding do, though the specifics of maintenance may be a little bit different. It’s just like with anything: If you want the look, you have to put in the work to keep it up.

Fortunately, maintaining your brick isn’t that difficult. Even better, the maintenance you do now can help prevent your brick siding needing major repairs in the future. So long as you’re willing to put forth a little effort, you should be able to keep your home looking great for years to come.

Cleaning Your Brick

The brick on your home is exposed to the elements on a 24/7 basis, and the rough surface of most bricks make them ideal for picking up dust and dirt. This can lead to damage over time, so once or twice a year you should take the time to clean your bricks. Most of the time this is as simple as spraying them down with a garden hose to remove any dirt and grime that’s built up on your home, though particularly tough spots and areas may need a scrub brush with soapy water as well. Avoid the temptation to use a power washer as the high water pressure can damage the brick.

Vegetation and Mildew Removal

While some plants such as ivy provide what some consider a dignified look, any vegetation that grows on your brick will damage it. Remove any vines, moss or other plants that you notice growing up your brick wall, making sure to wear gloves in case the plant is something that you don’t want to touch like poison ivy. You should also periodically check your brick for signs of mildew or mold, both of which can damage the brick surface as they grow. Scrub the area where you notice these growing, spraying them with a diluted solution of bleach and water to kill off any remaining remnants or spores. It’s a good idea to wet down the brick before you spray it, though, as this will prevent bleach from collecting in deeper contours of the brick and causing discoloration.

Checking for Damage

There are two types of damage you should check for at least once per year when you have a brick home. The first is impact damage, resulting from something hitting the brick and causing cracks, chips or other damage to it. This can come from a variety of sources, including things as ordinary as a lawnmower throwing a rock. The second type of damage to look for is water damage, which occurs when rain or splashing water repeatedly hits an area of the brick and starts to wear it away. Both of these can damage not only the bricks but the surrounding mortar as well. When damage is found, scrub the area to remove any loose material and keep an eye on the area to see if the damage gets worse over time. If the damage is caused by splashing water or other environmental issues, you might also adjust your landscaping or install additional drainage to redirect water and prevent further damage.

Repointing and Repair

As brick and mortar become damaged, you may need to make repairs from time to time. If the damage is just to the mortar, scrape and chisel away any damaged portions and apply new mortar to the entire area where wear and damage is present; this is typically known as repointing. If there are bricks that are damaged to the point that they need to be replaced, chisel away the mortar surrounding those bricks until they can be removed. Apply fresh mortar and new bricks to fill the damaged area.

Philip Schwartz
Decoding Your New Windows
new windows

New windows can make a huge impact on your home. Not only can installing new windows make your place look better, but those windows can also make it a lot easier to heat and cool as well. Sure, replacing old windows can eliminate drafts, but that’s only a small part of how installing new windows can increase your home’s energy efficiency.

Information about the efficiency of new windows is printed on a sticker that’s attached right to the glass. Unfortunately, if you don’t know what you’re looking at then these stickers may raise more questions than anything. If you need a little help understanding exactly what you’re looking at on your window sticker, here’s a rundown of everything you need to know.

What’s the U-Factor?

When looking at window stickers, two values are listed as “Energy Performance Ratings.” The first of these is the U-Factor, which provides information about the insulating ability of the window. This is similar to the R-Value that you find on insulation, and the U-Factor value will usually be somewhere between 0.20 and 1.20 on new windows. The lower this value is, the better the window is at insulating your home and preventing heat transfer between the inside and outside. If you want to think about this in terms of R-Value instead, simply divide 1 by your U-Factor value and you’ll end up with the corresponding R-Value (so a U-Factor of 0.20 would correspond to an R-Value of 1 ÷ 0.20 = 5, while a U-Factor of 1.20 would correspond to an R-Value of 1 ÷ 1.20 = 0.83.)

What About Solar Heat Gain Coefficient?

The other value listed under “Energy Performance Ratings” is the Solar Heat Gain Coefficient (SHGC). This measures how much heat is transferred through the window from sunlight (as opposed to the air heat transfer that is indicated by U-Factor.) The SHGC scales between 0 and 1, with lower values indicating a greater ability to block heat transfer from sunlight.

What Is the Visible Transmittance?

Beyond the “Energy Performance Ratings” entries on a window sticker, three other values are also provided to help you choose the window that best fits your needs. One important listing among these additional performance ratings is Visible Transmittance (VT). As with SHGC, the VT of a window scales between 0 and 1. In most cases you will want a high VT, however, as it indicates how much light passes through the window glass to provide daylight for your home.

What’s the Condensation Resistance Rating?

As the name suggests, the Condensation Resistance (CR) rating of a window indicates how well it can resist the formation of condensation on its surface. This not only indicates how likely you are to experience “fogging” and liquid condensation but can also indicate the likelihood of frost formation in the winter as well. This rating ranges from 1 to 100, with higher CR numbers indicating a greater resistance to condensation.

What Does Air Leakage Mean?

Another important performance rating is Air Leakage (AL). As the name implies, this measures how much air can leak through the window and affect the internal climate of your house. These values typically scale between 0.1 and 0.3, with lower values indicating a smaller amount of air leakage. One thing to keep in mind is that this is considered an optional rating, meaning that not all manufacturers will provide AL data; as a result, some window stickers might only have ratings for the other four values.

Philip Schwartz
Are There Benefits to Prepaying Your Mortgage?
prepay mortgage

A mortgage is one of the biggest single debts you’re likely to willingly take on. As such, being able to properly manage your mortgage is very important. With so many options when it comes to loans, repayment and refinancing, it can all get a bit confusing. One point in particular that you might hear a lot of talk about is prepaying your mortgage.

Should you prepay your mortgage? Should you focus on other things first? Before rushing into prepayment, make sure you have all of the information first. We’ll start by looking at exactly what mortgage prepayment is and how it works.

What Is Mortgage Prepayment?

As the name suggests, mortgage prepayment is the act of paying some or all of your mortgage principal before it’s actually due. This can take a number of forms, from paying a higher amount than the actual payment that’s due each month to making additional payments in months where you have money to spare. Some homeowners even make a single large additional payment every year after getting a tax return. Regardless of the specific form that prepayment takes, the end result is the same: More of your outstanding mortgage balance gets paid off, resulting in a decrease in both the amount that you still owe and the amount that interest can be applied to.

What Are the Benefits of Prepaying?

There are several benefits to prepaying your mortgage, regardless of how often the payments are made. Consider the following and how they might apply to your mortgage situation:

  • Faster repayment of the mortgage loan

  • Decreased cost of the mortgage over time

  • Equity is accrued at a faster rate

  • Prepayment reduces principal, making it easier to qualify for refinancing

Essentially, prepayment gives you more control over your loan and helps you to save money, build equity and pay off the loan faster. Because you’re paying it down at a faster rate, you’ll likely have an easier time refinancing for a better interest rate and loan terms down the road as well. And since the prepayment is optional, you can always skip prepayments and simply pay the monthly payment due if money is tight. Because of this, many people choose to incorporate prepayment plans into their overall preparations for retirement.

Are There Any Downsides?

While there are definitely benefits to prepaying your mortgage, there are potential downsides as well. Some mortgages, especially those with adjustable rates, are designed to not allow prepayments; if you attempt to prepay on the mortgage, this can trigger a penalty fee. Additionally, some lenders only accept prepayments in certain forms and will apply any other money received as simply an early payment against the next month (which means that the money will go toward interest and principal and not just your principal loan balance.) Attempting to prepay when you have significant debt elsewhere or don’t have a safety net built up for yourself isn’t a good idea, either; your mortgage likely has a lower interest rate than most if not all of your other debts, so you may be better off paying them off and building up savings and retirement funds first before you start worrying about prepaying a mortgage.

Should You Prepay Your Mortgage?

Whether or not you should prepay your mortgage depends on a number of factors. You should consider the type of mortgage you have, how much your monthly mortgage payments are and what your interest rate looks like. You should also take a look at your overall finances and how well prepared you are for emergencies and retirement; it’s possible that your money would be better off going elsewhere at the moment. Even if prepayments seem feasible and affordable, make sure that your lender accepts prepayments without penalty and that you know how they prefer to receive prepayments. Those extra payments won’t do much good if your lender simply applies them against interest or charges you a penalty fee because prepayments aren’t allowed by your loan.

Philip Schwartz
5 Tips for DIY Paint Disposal
paint disposal

A lot of DIY projects involve paint. Unfortunately, the majority of them don’t use the exact amount of paint that comes in the cans you buy. This leaves you with extra paint that you don’t have anything to do with, and over time you might even build up quite a collection of excess paint cans. Don’t just dump them out or throw them away, though… doing so is illegal in most areas. If you’re not sure what to do with all of the paint you’ve got left over, here are a few things to think about.

Know What You’re Dealing With

The very first thing you should do when getting ready to dispose of the paint you’ve used for a project is to identify the type of paint you have. You should have either oil-based paint or latex paint, and if you aren’t sure then you need to check the label. There are typically more options available to dispose of latex paints than oil-based paints, so taking the time to figure out which type of paint you have is essential to make sure you don’t dispose of your paint in a way that could get you in trouble.

Let It Dry

If you have latex paint to dispose of, you should be able to throw it out once it has dried. If there is only a little bit of paint left in the can, you can accomplish this by simply leaving the lid off of the can for a few days until it dries out. If you have a larger amount of paint, you’ll need to get at least some of it out of the can first. Consider pouring at least some of the paint into a cardboard box that you’ve lined with a plastic bag or otherwise sealed to prevent leaks. You can also apply the paint over cardboard, wood or paper with a brush or roller to create thick coats that you then allow to dry. If you still have unwanted paint, commercial hardening agents are also available that you simply mix into the paint and wait while the paint hardens.

Soak It Up

As latex paints are soluble in water before they dry, you can take advantage of this by diluting the paint with additional water. Once the paint is suitably watery, pour it over absorbent materials such as paper or foam. Allow these to dry and then dispose of the materials that will have the remaining paint soaked into them. If drying seems to be taking a long time, try setting the wet items outside and spreading them out as much as possible. The heat, sunlight and increased surface area will increase evaporation speeds, resulting in a faster overall drying time.

Upcycle the Paint

Before you get rid of your latex or oil-based paint, think about whether you have any upcoming projects that could benefit from it. Using the paint for other projects will help you to use up whatever’s left of the paint and will also save you from having to buy additional paint when those projects come around. It could even be that you have a project planned that you hadn’t originally considered painting at all but that might benefit from a coat of paint. Even if you don’t have any future painting projects coming up, others might; ask any DIYers that you know if they need paint or check online for DIY groups in your area that trade paint and other supplies.

Safe Disposal Services

Knowing where to recycle or otherwise dispose of liquid paint is important, especially if you have oil-based paints that can’t simply be thrown away. Recycling centers, environmental groups and hazardous waste disposals often have paint recycling and disposal services that accept both latex and oil-based paint. If you aren’t sure where to look, check online or ask around at local hardware and paint supply stores to get recommendations.

Philip Schwartz
Outdoor Fireplaces: Your Need to Know Get Started Guide
outdoor fireplace

Adding an outdoor fireplace can be a great way to liven up your backyard or patio area. Not only do outdoor fireplaces provide a unique visual aesthetic, they can also serve a functional purpose. Even though it’s outside in the open air, the heat produced by an outdoor fireplace can actually keep the surrounding area fairly warm on cool autumn evenings. Before you decide to have an outdoor fireplace installed, though, there are a few things you should take into consideration.

Fireplace Materials

Depending on the look and functionality you want, there are a few different options available in regard to what your fireplace can be made of. Commercial outdoor fireplaces made of iron, steel or other metals are available for purchase and installation as-is. If you’re building the fireplace itself, materials such as concrete, brick and stone are often used. In many cases, a concrete or stone fireplace will feature supplemental components made of metal such as fireplace grates and racks to hold logs or other fuel.

Chimneys

Another important aspect of your outdoor fireplace is the chimney. Even though the fireplace is outside, you still need to divert smoke up and away from you and your guests as there are a number of hazardous materials found in fireplace smoke. A number of options made of metal or other heat-resistant materials are available, and it is also possible to build a chimney from brick or stone as well. Even if the chimney is constructed from one of these materials, a liner may be needed to prevent smoke from leaking out of cracks or gaps in the chimney construction.

Fuel Options

Wood is the most popular fuel option for outdoor fireplaces, though it is not the only one. Propane fireplaces are also a possibility, though fuel lines will have to be run through the fireplace material so that the tanks can be hooked up safely away from the fire. Other less common options include pressed wood pellets, charcoal and even some forms of biofuel.

Cooking Options

Many people who own outdoor fireplaces use them for cooking as well, allowing the fireplace to double as a rotisserie or a wood-fired pizza oven. This may restrict some of your fuel options as the fuel needs to be food safe, and the fireplace design will need to incorporate a large enough chimney to prevent excess smoke from building up around the food. Depending on the design you want, additional components such as metal cooking grates, a heat stone, rotisserie controls or other features may also be needed.

Cleaning and Maintenance

As with any fireplace, an outdoor fireplace will require periodic cleaning and maintenance. This is especially important before winter as the fireplace will be exposed to potential freezing temperatures and other inclement weather that could cause cracks or other damage to appear. The fireplace should have a visual inspection every few months for signs of problems and should have its chimney cleaned at least annually. After any period where the fireplace has not been used for more than a few weeks, the chimney should also be checked to make sure that birds or other animals have not attempted nesting or otherwise created potential blockages within the chimney.

Other Considerations

Before installing an outdoor fireplace, be sure to check and see whether there are any restrictions or ordinances in place in the city where you live. If you’re in a homeowner’s association, you should also check to see if they have any rules concerning outdoor fireplaces. You may be restricted in the materials you can use, the fuels you can put in it, the height of your chimney and even the location of the fireplace, in regard to nearby vegetation or buildings. Installing an outdoor fireplace without checking this first could result in fines or possibly even having to remove the fireplace entirely.

Philip Schwartz
Alexa, Am I Out of Milk? Smart Appliances 101
smart fridge

It seems like everything is getting smart these days. First the phones were smart, then the thermostats. Now you can buy smart lighting, smart locks, smart cameras and even smart little sensors that can tell you when there’s a water leak or a window is unlocked. What about your appliances, though?

Smart appliances do exist, and they’ve seen a significant increase in popularity in recent years. They offer several useful features, including smartphone interactivity and increased energy efficiency. Consider the following to see if smart appliances are right for you.

What Makes Them ‘Smart’?

So-called “smart” devices are called this because they offer functionality beyond what you would receive from a non-smart version of the device. Smartphones run apps and feature options such as Wi-Fi, Bluetooth and NFC payment options that standard cellular phones don’t. Smart thermostats are programmable and can read temperature data from multiple sensors to create a more comfortable environment throughout the whole home. The same convention applies to smart appliances: They can do things that your regular appliances can’t.

Smart Microwaves

There are a few different options available when it comes to smart microwaves. Some units can estimate the necessary cook time for what you’re heating up. You can also find smart microwaves that adjust their intensity automatically based on how well their contents are cooking, helping to prevent the dried out and rubbery texture that often comes from microwaving. Many smart microwaves can be controlled over Wi-Fi from your smartphone, and some even interface with virtual assistants like the Google Assistant or Amazon’s Alexa to allow voice commands as well.

Washers and Dryers

Smart washers and dryers are focused on saving you money, adjusting details like water level or dryer heat based on the size of your load to reduce energy costs. The ability to check their status and start or stop a cycle from a smartphone is also a big feature for smart washers and dryers, making it easier for you to control them without having to come back and check periodically to see if they’re still running. In many cases, the washer or dryer can even send an alert to your phone at the end of the cycle so that you know exactly when your clothes are ready.

Smart Refrigerators

Energy efficiency is a priority for smart refrigerators as well. In addition to more accurately measuring internal temperatures and working through cooling cycles more efficiently, some smart refrigerators are designed to maintain a more consistent internal temperature by reducing how often you open the door. A video screen in the door can be activated, turning on internal lights and a camera that shows you exactly what’s on the shelves. Depending on the model, these images can even be sent to a smartphone or accessed via an app so that you can get a clear view of what’s in the fridge while you’re at the store.

The Future Is Smart

Of course, these are only a few of the smart appliance options available to you. Smart air filtration systems, ice makers, blenders and more are available to help you live your best life while making your kitchen (and home) more efficient and easier to control. You can even get a Wi-Fi enabled version of your Instant Pot to give you easy control of what you’re cooking, regardless of whether you’re in the kitchen or not. As both these small appliances and larger smart appliances such as ovens and refrigerators become more common, consumers can expect even more connective versions of smart appliances moving into the future.

Philip Schwartz
Foundation Cracks Don’t Have to Spell Disaster
foundation crack

Cracks in the foundation of your house can be signs of a problem. This doesn’t mean that you should automatically worry if you see a few small cracks, however. Believe it or not, there are a few perfectly normal reasons why cracks can appear in your foundation. It’s important to look into the issue if you notice cracks – but hold off on assuming the worst until you determine whether there’s a problem worth worrying about.

What Causes Foundation Cracks?

There are a few different things that can cause cracks in your foundation. In some cases, the cracks are simply caused by the settling of your home over time or soil expansion if your home is built on land with a lot of clay in the soil. Other potential causes of foundation cracks include:

  • Drainage issues around the home

  • Insufficient reinforcement to support the weight of the house

  • Major home renovations or add-ons such as adding a second story

  • Tree roots under the soil

  • Earthquakes, sinkholes or landslides that have affected the area

  • Deep soil freezing during the winter

As you can see, there are a lot of potential reasons why cracks might appear in your foundation. This isn’t even an all-inclusive list! Despite the wide range of possible causes, it’s important to not get ahead of yourself and worry over the cracks until you’ve figured out whether they actually indicate a serious problem.

Examining Foundation Cracks

The first thing you should do when you notice cracks in your foundation is get a good look at them and where they appear. Taking photos may help with this since they’ll give you an easy-to-access reference later on. If possible, include an object of known size in the pictures to give you a sense of scale; coins, ink pens or other common objects are easy to use in this regard.

When looking at the cracks in your foundation, take note of the direction of the crack, how wide the crack is and whether it has a uniform width. If there is an obvious point of origin (such as a crack that starts at the corner of a basement window or foundation vent) then you should take note of this as well. If you have a crawlspace or basement under your home, go in and examine the foundation wall from the other side to see if the crack is visible there was well. The more information you have about the crack, the easier it will be to determine whether there’s a problem.

Is the Crack a Problem?

Small, thin cracks in the foundation usually aren’t much to be concerned about; they typically form as the house and the soil beneath it settle into place. Likewise, small cracks that appear after a particularly harsh winter shouldn’t be a major concern since they are easy to seal before the next bout of cold weather comes around. There are some cracks that you need to watch out for, though.

Horizontal cracks, straight vertical cracks and cracks that are wider at one end than the other are all signs of potential problems. These can indicate that the foundation is cracking due to a much larger problem than just settling or bad weather. Check the depth of the crack, especially if you have a crawlspace or basement; a crack that goes all the way through the foundation wall can be very bad indeed. You should also see if there are multiple cracks forming around the same area or if any of the cracked areas correspond with cracks or other issues inside the house.

If the cracks seem recent, clean up the area and place marks on the wall beside the cracks. This will let you look for new debris or changes to the crack length over the next several days. Large cracks or cracks that seem to still be growing need to be repaired before they can cause significant issues.

Philip Schwartz
Who Do You Call When a Water Pipe Bursts?
what to do if a pipe bursts

A burst water pipe is no laughing matter. Depending on the size of the damaged area, a large pipe can lose a gallon or more per second. Even smaller pipes can cause a significant amount of water loss, not only driving up the water bill but also potentially causing a lot of water damage. When you’re dealing with a burst pipe, it’s important to take action quickly to stop excessive water loss and get the pipe fixed as soon as possible.

Depending on the pipe that bursts, though, do you even know who to call? If a pipe is in your home then you obviously need to call a plumber, but do you know who’s responsible for maintenance if the rupture happens outside of your home? As it turns out, the responsible party depends on where the pipe is located.

Is a Pipe Really Broken?

Before you pick up the phone, make sure that you know that a burst pipe is the problem. If you’re simply experiencing a drop in water pressure, it’s possible that you don’t have a burst pipe at all. Look for some of the signs of burst pipes, including:

  • Water spraying from the ground or visible section of pipe

  • Puddles forming despite a lack of rain

  • Odd colors or smells coming from tap water, or debris in the water

  • Sounds of running water even when visible water isn’t present

  • Significant increases in your water bill despite not using more water

If the pipe is located in your house, then you may also notice damp spots on the walls, blistering paint, an increase in mildew or even water stains appearing on your walls or ceiling.

Burst Water Mains

If a water main bursts, the responsibility for the pipe falls on the city or water district you get your water from. That means you need to contact them and let them know that there’s a damaged pipe near your home. Provide as much information as possible about the break, including the location and how much water seems to be coming from the pipe. If there were extenuating circumstances surrounding the break such as an accident or a worker driving a post down into the pipe, be sure to provide this information as well.

Pipes in Your Yard

In most cases, if the pipe that breaks is in your yard then it’s considered your responsibility. Even if it’s the pipe that connects your home to the water main, there will likely be very little that your water district will be able to do about it. This means that you’re going to need to call a plumber and let them know what’s going on. Provide as much detail about the problem as you can so they’ll have a better idea of what equipment is needed to fix the burst pipe.

Household Plumbing

If you have a broken pipe inside your home, then you’ll definitely need a plumber. Some household pipe problems are easy to spot, such as a pipe that’s spraying water in your basement. Others are hidden in walls or only have small cracks and may require some work to get to. As with pipes in your yard, provide the plumber with as much information as you can so they can take care of the problem quickly.

What to Do When a Pipe Breaks

In addition to calling the appropriate party to get the leak fixed, there are other things you should do when you discover a broken pipe. If the pipe is in your yard or home, locate the water shutoff valve in your yard (usually hidden under a black or metal cover) and turn it to shut off the water flow. Clear out any affected areas, removing or relocating items that could be damaged by the water and placing them in areas where they can dry. At your first convenience, head to the store and pick up a few gallons of bottled water to serve as drinking water until the problem is fixed. Make sure that you have enough to last a few days if you had a ruptured water main, as there will likely be a boil water order to follow.

Philip Schwartz
Kitchen Fires 101
kitchen fire

Several of the biggest fire hazards in your home all live in your kitchen. The oven, the stovetop, your toaster… when you think of all of the heat sources your kitchen contains, it’s almost a wonder that it doesn’t burst into flames on the regular. Joking aside, the kitchen is usually a pretty safe place so long as you keep an eye on things. That doesn’t mean that you should ignore fire safety rules when in the kitchen, of course – knowing how to handle a kitchen fire can mean the difference between a scare and a tragedy.

Kitchen Fire Safety

There are a number of potential causes of kitchen fires. There are the usual fire hazards such as electrical shorts, but you also have kitchen-specific risks such as splashing oil or something falling onto a heating element. Because there are so many potential causes of a kitchen fire, your fire safety measures need to be a bit wider reaching than what you might use for other rooms in your house.

A smoke detector is important in the kitchen, as is a fire extinguisher that you can access easily. Make sure you choose the right fire extinguisher, though; opt for an ABC fire extinguisher if possible. These can be used on Class A (trash/wood/paper), Class B (oil and liquids) and Class C (electrical equipment) fires. Establish an area where you can put oven mitts, cookbooks and similar materials far enough away from the stovetop to prevent any of them from falling onto a hot surface. Inspect kitchen appliances regularly for damaged cords or other fire hazards and replace anything that could present a danger.

Oven Fires

If a fire breaks out in your oven, your first instinct is likely to open the oven and try to put the fire out. That’s one of the worst things that you can do, though; opening the oven provides much-needed air to the fire and can make it significantly worse. Just opening the oven door can cause the fire to explode outward, potentially burning you and spreading to surrounding surfaces.

Instead, turn off the oven and leave the door closed. This will limit the availability of oxygen, causing the fire to die down and eventually go out on its own. Keep an eye on the fire, though, since if it doesn’t start dying out or seems to be getting stronger, you’ll likely need to call the fire department to deal with it.

Fires on the Stovetop

Stovetop fires come in several forms. If something falls onto a hot burner, that can cause a fire. If oil or other flammable liquids get too hot or splash out of a pan, that can also cause a fire. Even letting a pan boil dry can cause a fire. Fortunately, the majority of stovetop fires are preventable by keeping an eye on the stove whenever there’s at least one hot burner.

If a fire breaks out on the stovetop, there are a few things that you can do. If it’s a very small fire such as a grease fire in a pan, simply putting a metal lid on the pan may be enough to put the fire out. Slightly larger fires can be doused using baking soda, but do NOT use flour… though you may have heard that flour is okay to use, flour is finely ground dried plant material and is actually very flammable. Your fire extinguisher is also an option, as is calling the fire department before things get too far out of control.

Philip Schwartz
Invest in Your Renters by Screening Them Well: Top Questions to Ask
rental interview

If you own a rental property, you know how important it is to have the right tenant. Good renters will take care of the property as though it were their own, leaving it as close to how they moved in as possible. Bad renters, on the other hand, make it obvious that they don’t care, since it’s not actually their house; it can take a significant amount of time and money to get your property back to rentable condition after they move out. Wouldn’t it be great if you could only rent to the first group and avoid the second group entirely?

While you may still occasionally get a bad tenant, with a bit of smart screening you can greatly increase your chances of finding good renters every time. This goes beyond the standard screening techniques like a credit check; it’s all about the questions you ask before making your decision. Here are a few of the best questions to ask potential renters to see if they’re the ones you really want to rent to.

Why Are You Moving?

This is a great question to start with because it gives you an idea of what motivates potential renters. Ideally, you’ll find someone who’s moving for a reason such as work relocation, trying to find a bigger house for their family or trying to find a better neighborhood or school system for their children. Watch out for people who complain about their current landlord or who seem to be trying to escape a negative situation.

Would Your Current Landlord Provide a Reference?

Talking to a current landlord gives you two important pieces of information: It lets you find out what sort of a tenant the potential renter is, and also tells you that they have been upfront with their landlord about the fact that they’re moving. Someone who wants to keep you from talking to their landlord may have something to hide.

Have You Ever Broken a Lease?

There are legitimate reasons to break a lease. Reasons such as work relocation and having to move because of unexpected family circumstances shouldn’t weigh against a potential tenant, and asking this up front gives them a chance to open up about any broken leases in their past. If they try to cover it up or cite reasons such as landlord conflicts or problems paying rent, though, then this could be a big red flag.

How Long Have You Been with Your Employer? How About the One Before That?

This is perhaps even more important than how long they’ve lived in their current home. A long period of employment shows job stability and being a new hire after working for a long period can show ambition and a desire to get ahead. On the flip side, people who have trouble maintaining a job for longer periods could have trouble paying the rent.

Who Will Live on the Property? Will There Be Any Pets?

When asking these questions, be sure not to lead the answer by saying things like “This property is intended for two people” beforehand. Give potential tenants a chance to answer to help ensure that they do so honestly. If the answer violates a no-pets policy or sounds excessive for the property, you can reveal this afterward to let them know that they’re not right for your property.

Will There Be Any Smokers on the Property?

An increasing number of rental units are going no smoking, in part because of the difficulty associated with getting smoke stains and smells out of curtains and carpet. While it’s up to you to decide on your smoking policy, if you don’t want smoking in the house then make sure that potential renters know that up front.

Will You Consent to a Background Check/Credit Check?

Not all landlords use credit and background checks, but it’s always a good idea to ask if potential renters will consent to one. If they have credit history issues or legal problems in their past, it gives them a chance to be upfront about it and provide you with the information you need to make a decision. If they don’t justify why they don’t want the info checked, it may also hint at problems they’re trying to hide.

Do You Have Any Questions for Me?

Giving potential renters a chance to ask you questions helps you make sure that they know everything they want to know about your property and your policies. If they don’t ask questions, consider how attentive they were during previous questions when you make your decision. If they were just trying to get through the interview process without paying attention, they may not be the renter for you.


Philip Schwartz
Smarter Climate For Every Room In The House
smart thermostat

Home automation is increasingly common these days as the number of consumer-focused smart devices continues to increase. Though automation covers everything from light controls and security systems to water leak monitors and door locks, one of the most common automation devices is the smart thermostat. These thermostats offer improved climate control and energy savings through programmable adjustments for a range of different scenarios.

There is one issue with the early smart thermostats that were introduced, however: most of them only offered a single point of climate control, not taking into account several common heating and cooling scenarios that require a bit more nuanced control. Fortunately, there are other thermostat systems now available that provide smarter climate control options.

Why a Multi-Room Approach is Important

There are a number of reasons why having a single point of temperature control isn’t always ideal. In some cases, rooms that are farther away from your unit may not get the same degree of air flow,
especially in older systems; if everything is controlled by a single thermostat located near the air intake then the rooms with lower air flow won’t get the air that they need to keep pace with the rest of the house. Similar problems can occur if you have a split system or zoned heating and cooling. It may be a cool 68 in your living room, but rooms that are served by other system components could be staying in the 70s or higher.

You Need a Multi-Room Thermostat

Regardless of the reason, if your thermostat isn’t able to consistently heat or cool your entire home then it’s not going to be nearly as efficient as you’d like. That’s where a multi-room thermostat system comes in handy. These thermostats have additional sensors that you can mount in other rooms around the house. These sensors take additional temperature readings and broadcast the data back to the thermostat. The thermostat takes this additional data and adjusts the way it heats and cools your home with a focus on maintaining the entire home’s temperature instead of just the room where the thermostat’s located.

Because the thermostat has information from all over your house, the amount of warm or cool air
circulated into each room is adjusted based on the home’s actual needs. This gives a greater amount of control over the internal temperature of the house, preventing warm and cool spots. It also ensures that adjustments made when you’re not in certain rooms or when you leave the house are optimized to save you the most money on your heating and cooling costs.

Taking Control of your Home Climate

There are a number of models of multi-room thermostats that you can choose from. The initial
installation shouldn’t be any more complicated than any other thermostat replacement, as the majority of multi-room units use wireless technology to communicate with the central thermostat. Since you don’t have to directly wire the satellite sensors you have a lot of freedom in where you place them without having to drill holes and run wires through your walls.

Once the thermostat is installed and all the sensors are in place, all that’s left is to sync the sensors with the central thermostat. How you do this may differ depending on the make and model of thermostat you choose, but each model should have detailed instructions on how to connect the units together. Once everything’s connected, all that’s left is to sit back and enjoy the controlled climate.

Philip Schwartz
What’s an Attic Exhaust Fan and How Do They Work?
attic exhaust

Keeping your house cool in the summer and warm in the winter can be expensive. Add in the cost of regular maintenance to your heating and air systems and it’s no wonder that many homeowners look for other ways to keep things cool. One increasingly popular option is the attic exhaust fan. These fans help you to circulate air through the attic eliminating the buildup of heat that attics often experience which can make your whole house seem hotter.

How do these fans work, though? Do they really save you money? Perhaps most importantly, how can you get an attic fan of your own to get rid of all of that heat your house is holding? Let’s take a look at these questions and see if an attic fan is right for you.

What Is an Attic Exhaust Fan?

As the name suggests, an attic exhaust fan is an electric fan that blows the hot air inside the attic out into the great outdoors. While many of these fans are wired into the electrical system of the house, some are solar powered so that they don’t add to your electrical usage. As the fans blow hot air out of the attic, cooler air from outside is pulled in from vents to keep the overall attic temperature lower. This air cycling also helps prevent mold and mildew that can result from moist air becoming trapped in the attic – something that’s useful both during the summer and in other parts of the year as well.

How Do Attic Fans Work?

Many attic fans are connected to a thermostat, allowing them to turn on and off when the temperature in the attic passes a set temperature. Unless the fan is installed under an eave, the outer portion of the fan generally has vent panels that open and close automatically as well based on airflow through the fan body. This allows the fan to blow without hinderance while ensuring that the fan is covered to prevent rain and pests from getting into the attic.

Another important part of the attic fan system is the series vents that allow air from outside to enter the attic. These vents are installed in the soffit and gable around your roof, allowing air to flow through the vents and into the attic space when the fan is active. Since the attic builds up heat, the air outside is typically much cooler than the air in the attic, even during the summer. This cycling of air lets cooler outdoor air enter the attic, keeping the attic space at a much more respectable temperature, so it won’t heat up the ceilings and other air in the house.

Installing Your Own Fan

Installing an attic exhaust fan is often seen as a DIY job, with homeowners making the appropriate cuts and installing the various components themselves. Since you’ll need to cut through portions of the wall or roof to install the fan, it’s definitely a project that you’ll want to double-check all of your measurements on before you dive into the work. Ensure that you schedule the job for a day when there isn’t any rain or temperature extremes in the forecast and follow all installation instructions exactly to prevent leaks or other damage.

Once your fan is installed, it’s important to check your insulation and try to locate any air leaks from within the main house itself. A well-insulated attic gives you a greater amount of temperature control, though you’ll want to make sure that you didn’t accidentally cover up your intake vents or else air won’t be able to flow from outside. Likewise, track down any cold air leaks from within the house to prevent the fan from pulling air-conditioned air up into the attic; if you don’t prevent this, your AC unit will have to work even harder as it cools more air to replace what’s being drawn up into the attic space.

Philip Schwartz
What Do You Know About Airflow? Choosing Air Filters 101
install an air filter

Air filtration is an important part of your home’s ventilation system. Without an air filter in place, dust and other airborne particles would be distributed throughout your ductwork. This could aggravate allergies, build up on your vents to reduce airflow and possibly even create bigger problems over time.

This doesn’t mean that you can just grab any air filter and slap it in place, of course. Choosing the right air filter for your home is important if you want to get the most life out of your heating and cooling system. Stop for a moment and think about your HVAC system; do you really know what sort of air filter you need to keep things running in top condition? If you don’t, here’s what you need to know.

Where Is My Air Filter?

The first thing that you need to know about your air filter is exactly where in your house it’s located. This may seem kind of obvious, but some air filters are difficult to find. While the most common air filter location is behind a grate on one of the walls, some of these grates are in odd locations or are designed to somewhat blend in with the look of the surrounding wall. Filters may also be placed in the air handler unit (AHU) or rooftop unit (RTU). Buildings with split ventilation systems may even have multiple intakes that each have their own air filter. Depending on how your system is designed, it may take a bit of hunting to locate your filter.

Choosing an Air Filter

Once you’ve located your filter, it’s important that you choose the right one for your needs. Part of this involves finding the right size filter; different HVAC units are designed for different filters, and if you get one that doesn’t fit then you’re going to have trouble getting it (or keeping it) in place. Measure the dimensions of the area where the filter is mounted or look at the old filter and find the dimensions listed on it. Choosing an air filter is about more than just finding the right size, however; one other big consideration is the MERV rating (which stands for Minimum Efficiency Reporting Value.)

The MERV is a number that tells how good of a filter you’re buying. A low MERV of around 6 provides you with 35 to 50 percent efficiency at capturing large particles like dust, mold and pet dander. A MERV of 8 increases this to over 70 percent efficiency, capturing those particles as well as slightly smaller particles like pollen and dust mites. A MERV of 11 captures large particles with a greater than 85 percent efficiency, as well as medium particles like those found in auto exhaust with 65 to 80 percent efficiency. You can even go higher than that, with a MERV of 13 capturing large and medium particles with over 90 percent efficiency and small particles like smoke, bacteria and even odors with up to 75 percent efficiency.

There are other options available as well, such as HEPA filters (which you might hear referred to as high-efficiency particulate arrestance filters or high-efficiency particular air filters) that have an even higher standard of particle removal. HEPA filters must remove either 99.95 percent (in Europe) or 99.97 percent (in the United States) of all particles of size “small” or larger. Depending on the filter, this translates to a MERV value of around 17 to 20.

Air Filter Maintenance

There’s more to keeping your system running well than just installing a filter, of course. Most air filters should be changed monthly, though some may have different recommended use periods that should be listed on the packaging. Periodic cleaning of grates and vents may also be required to keep the filters clean and the system running efficiently. Failing to change your filters can reduce airflow and system efficiency, and over time, it can even reduce the life of your unit.

Philip Schwartz
Drywall Anchors: Secrets Revealed!
drywall-anchors.jpg

Whether you’re hanging a picture or mounting a television, anything that goes on your wall needs something to anchor it in place. If there’s a stud in the wall that you can attach it to then you’re fine; you’ve got well-supported wood to drive a screw into which will hold whatever you’re mounting in place. If you can’t find a stud where you need one, though, you could have a problem. That’s where drywall anchors come in.

What Is a Drywall Anchor?

Drywall anchors are small pieces that are slightly larger than the screws you’re using on a project. Depending on the type of anchor you’re using it might be made of plastic or metal, with small fins sticking out from the outside of the anchor body and a hole in the middle that runs the length of the anchor. The anchors go into the wall, then your screw goes into the hole. As you screw it in, the screw digs into the anchor body in much the same way it would with wood to ensure that the screw won’t slip out.

Anchors are designed to provide a tight fit for your screws. As the screw goes in, the anchor is forced to spread out and open up a bit. This pushes the body of the anchor against the sides of the hole you put it in, causing those little fins to dig into the surrounding drywall. The fins are positioned to go in easy but resist coming out, giving you a solid mounting even though there isn’t any wood or other solid material for your screws to secure to.

Plastic Anchors

There are multiple types of drywall anchors. Choosing the right one for the job you’re working on helps to reduce unnecessary damage to your drywall and ensures that the mounting is strong enough for the load it needs to bear. To ensure that you have the right drywall anchor for what you need to support, try to get an estimate of the weight of the load and check the packaging of different drywall anchors to find an anchor that can hold that much weight.

If you have a relatively light load, you’ll probably need a plastic anchor. The most common of these are known as expansion anchors and are essentially plastic sleeves that you hammer into a drilled hole and that simply spread out as you insert a screw. There are also threaded plastic anchors that look like oversized screws; they work similarly, except you screw them into place instead of hammering them. Regardless of the type of plastic anchor you use, the purpose is still to dig into the drywall and hold a screw in place.

Metal Anchors

For heavier loads you’ll likely wind up with a metal anchor. Though you may see some threaded metal anchors, the most common metal anchors are known as molly bolts and feature a metal sleeve with a screw already inserted into them. You hammer these into place as you would with an expansion anchor, then remove the screw. Once you’re ready to mount you place the screw back into the anchor and start tightening; this causes a portion of the metal sleeve to pull toward the screw, expanding metal arms on the other side of the drywall to create a much more secure fitting.

If you have an even heavier load, you’ll need to use a toggle bolt instead. These anchors consist of a metal bolt with foldable metal wings that the bolt screws into. You have to fold the wings so that they lie over the bolt, then insert them into a hole large enough that they can fit through to the other side. Once on the other side the wings will expand, preventing the bolt from coming back out. Make sure that there is a washer or something else that’s large enough to cover the hole, though, or the bolt head could slip through the hole and you’ll lose your toggle bolt into the wall.

Philip Schwartz
What You Need to Know About Cleaning for Coronavirus
how to clean for coronavirus

There has been a significant amount of concern raised recently about COVID-19, a relatively recently discovered disease caused by a type of virus known as a coronavirus. A lot is still unknown about the virus and the disease that it causes, and this is causing some people a great deal of anxiety about it. Major conferences and events are being canceled, people are buying up supplies (even if they shouldn’t), and the internet is filled with memes teaching people how to wash their hands.

COVID-19 has the potential to be a serious illness. Here’s some info that can help you to protect yourself, especially if you’re confused by some of the contradicting advice that you might have seen online.

What Is COVID-19?

Even though it’s mostly referred to simply as “coronavirus”, the virus that causes COVID-19 is actually a novel coronavirus that’s been designated “SARS-CoV-2” and sometimes referred to as “2019-nCoV.” COVID-19 itself is a potentially severe respiratory illness that typically presents with fever, cough and difficulty breathing. While most people who become infected with COVID-19 recover, the disease can be severe and even fatal. Those at greatest risk from COVID-19 are individuals older than 60 years of age and those with preexisting conditions such as heart disease or diabetes.

Decluttering to Prevent Illness

If you want to clean up to try and prevent coronavirus infection, a good first step is to declutter your home. This will eliminate surfaces where the virus could linger, making it easier to disinfect your home and keep it clean. Decluttering can also have a positive effect on mental health and anxiety levels, which can improve your overall wellbeing and even provide a bit of a boost to the immune system.

Disinfecting Surfaces

The US Centers for Disease Control recommend disinfecting surfaces with regular household disinfectant wipes and sprays. While many of these have not been tested specifically for use against SARS-CoV-2, they are effective against some other common coronaviruses and are likely to at least reduce infectiousness if not kill the virus completely. Other household cleaners and disinfecting practices are also likely to be at least partially effective.

Handwashing Stations

One of the best defenses against COVID-19 is good handwashing practices. As such, make sure that you have soap available by every sink and clean towels ready for use after washing your hands. Printing out a guide to proper handwashing and placing it near your sinks can also be a good idea, especially if you have young children who are still learning how to wash their hands properly. If you have any, having hand sanitizer accessible for times when you can’t wash your hands is also helpful.

Don’t Panic

Perhaps the most important thing to remember is that you shouldn’t panic. Don’t stockpile supplies that you don’t need, buy sensible amounts of the things that you do need, and take reasonable steps like avoiding large crowds and not shaking hands. One of the best ways to stay safe from COVID-19 is to keep yourself clean, keep your home clean and apply some common sense to your preparations for the disease.

Philip Schwartz
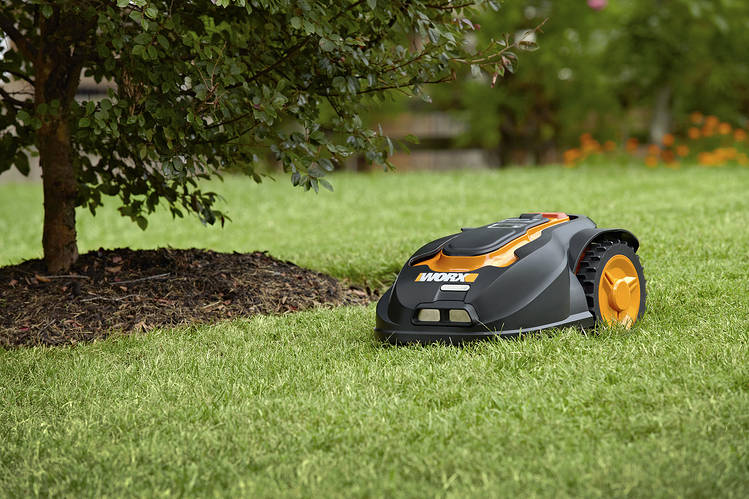
Robo Lawnmowers: Like a Roomba for Your Lawn
robo lawn mower

Robotics and automation have changed the way that a number of things work in the home. You may not realize that you can automate tasks outside of the home as well. Though they have not received as much attention as home automation sensors and digital assistants, robotic lawn mowers are starting to change the way that people approach lawn care. Modern robotic lawn mowers were introduced only in recent years, but the devices have a longer history than you might think.

Introducing the MowBot

Believe it or not, the first robotic lawn mower was actually created and patented in 1969. Dubbed the MowBot, the robotic device was self-propelled and capable of making random turns within an area defined by a signal wire that was used to create a boundary. Though the battery-powered device was primitive compared to today’s robotic lawn mowers, the approach it took to lawn maintenance wasn’t that far off from how today’s devices work. It had some staying power as well, as MowBot Inc. is still producing robotic mowers today that are more modern takes on the original MowBot functionality.

The Modern Robotic Lawn Mower

While robots like the MowBot persisted since the 1960s, it wasn’t until the 1990s that the more modern style of robotic lawn mowers began to emerge. A solar-powered mower was developed in 1995 by Husqvarna, and this was followed in the next 10 years by other niche robotic lawn mower designs. Smaller-scale robotic mower releases occurred in the United States and the UK in 2000, but it wasn’t until 2005 that the first widespread commercial release of a robotic lawn mower occurred. Interestingly, these mowers used the same sort of signal wire that the MowBot had combined with a few more modern features.

The market has taken off in the time since then, with a variety of solar-powered and self-charging robotic mowers hitting the market with innovations such as programmability, autonomous obstacle avoidance and even the ability to program or control the mower remotely from a smartphone or similar device. Some modern robotic mowers are even designed to only trim a small section of the grass blades at a time, opting instead to mow more frequently (often without any input from their owners) to keep the lawn in optimal shape.

Benefits of Robotic Lawn Mowers

Robotic lawn mowers offer a number of benefits over traditional push mowers or riding lawn mowers. A few of the benefits of these mowers include:

  • Electric-powered robotic mowers reduce fuel costs and carbon emissions

  • Smaller, more frequent cuts prevent excessive strain on your lawn that could result in browning or other damage

  • Lightweight units that use random movements while cutting the lawn prevent damage caused by mowing in the same pattern repeatedly

  • Electric units with smaller motors significantly reduce noise pollution while cutting

  • The mulching action of robotic lawn mowers recycles clippings to feed your lawn throughout the year

Other benefits of using a robotic lawn mower include increased free time, more consistent lawn heights and the elimination of the dangers of injury created by the traditional lawn mower.

Philip Schwartz